> ## Documentation Index
> Fetch the complete documentation index at: https://lightdash-mintlify-cccf65ca.mintlify.site/llms.txt
> Use this file to discover all available pages before exploring further.
# Authenticating your CLI
## Login
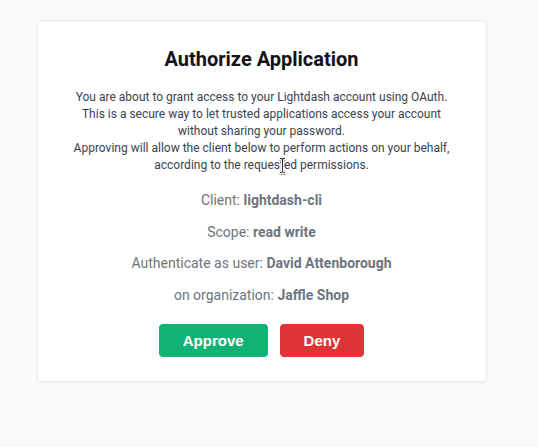
The CLI uses browser-based OAuth login by default, making authentication quick and easy.
### Basic login
```bash theme={null}
lightdash login {{ lightdash_domain }}
```
where `{{ lightdash_domain }}` is the subdomain for your Lightdash instance. For example, if you login at `https://petey.lightdash.cloud`, then you would type `lightdash login petey` to pop up a login window.
```bash theme={null}
lightdash login petey
```
This opens your browser to authenticate. Once authorized, you're logged in and ready to use the CLI.
 ### Flexible URL formats
The CLI accepts your instance URL in multiple formats, all of these work:
```bash theme={null}
# Just your subdomain (recommended for Lightdash Cloud)
lightdash login your_subdomain_here
# Full domain without protocol
lightdash login your_subdomain_here.lightdash.cloud
# Full URL with protocol
lightdash login https://your_subdomain_here.lightdash.cloud
# Any URL from your Lightdash instance (useful for copying from browser)
lightdash login https://your_subdomain_here.lightdash.cloud/projects/abc123/dashboards
```
For Lightdash Cloud users, you can simply use your subdomain (e.g., `petey` if your instance is at `petey.lightdash.cloud`).
For self-hosted instances, you can use the full domain without the `https://` prefix - it's assumed automatically.
### Re-authenticate to a previous instance
Once you've logged in, you can re-authenticate without specifying the URL:
```bash theme={null}
lightdash login
```
This uses your previously saved instance URL.
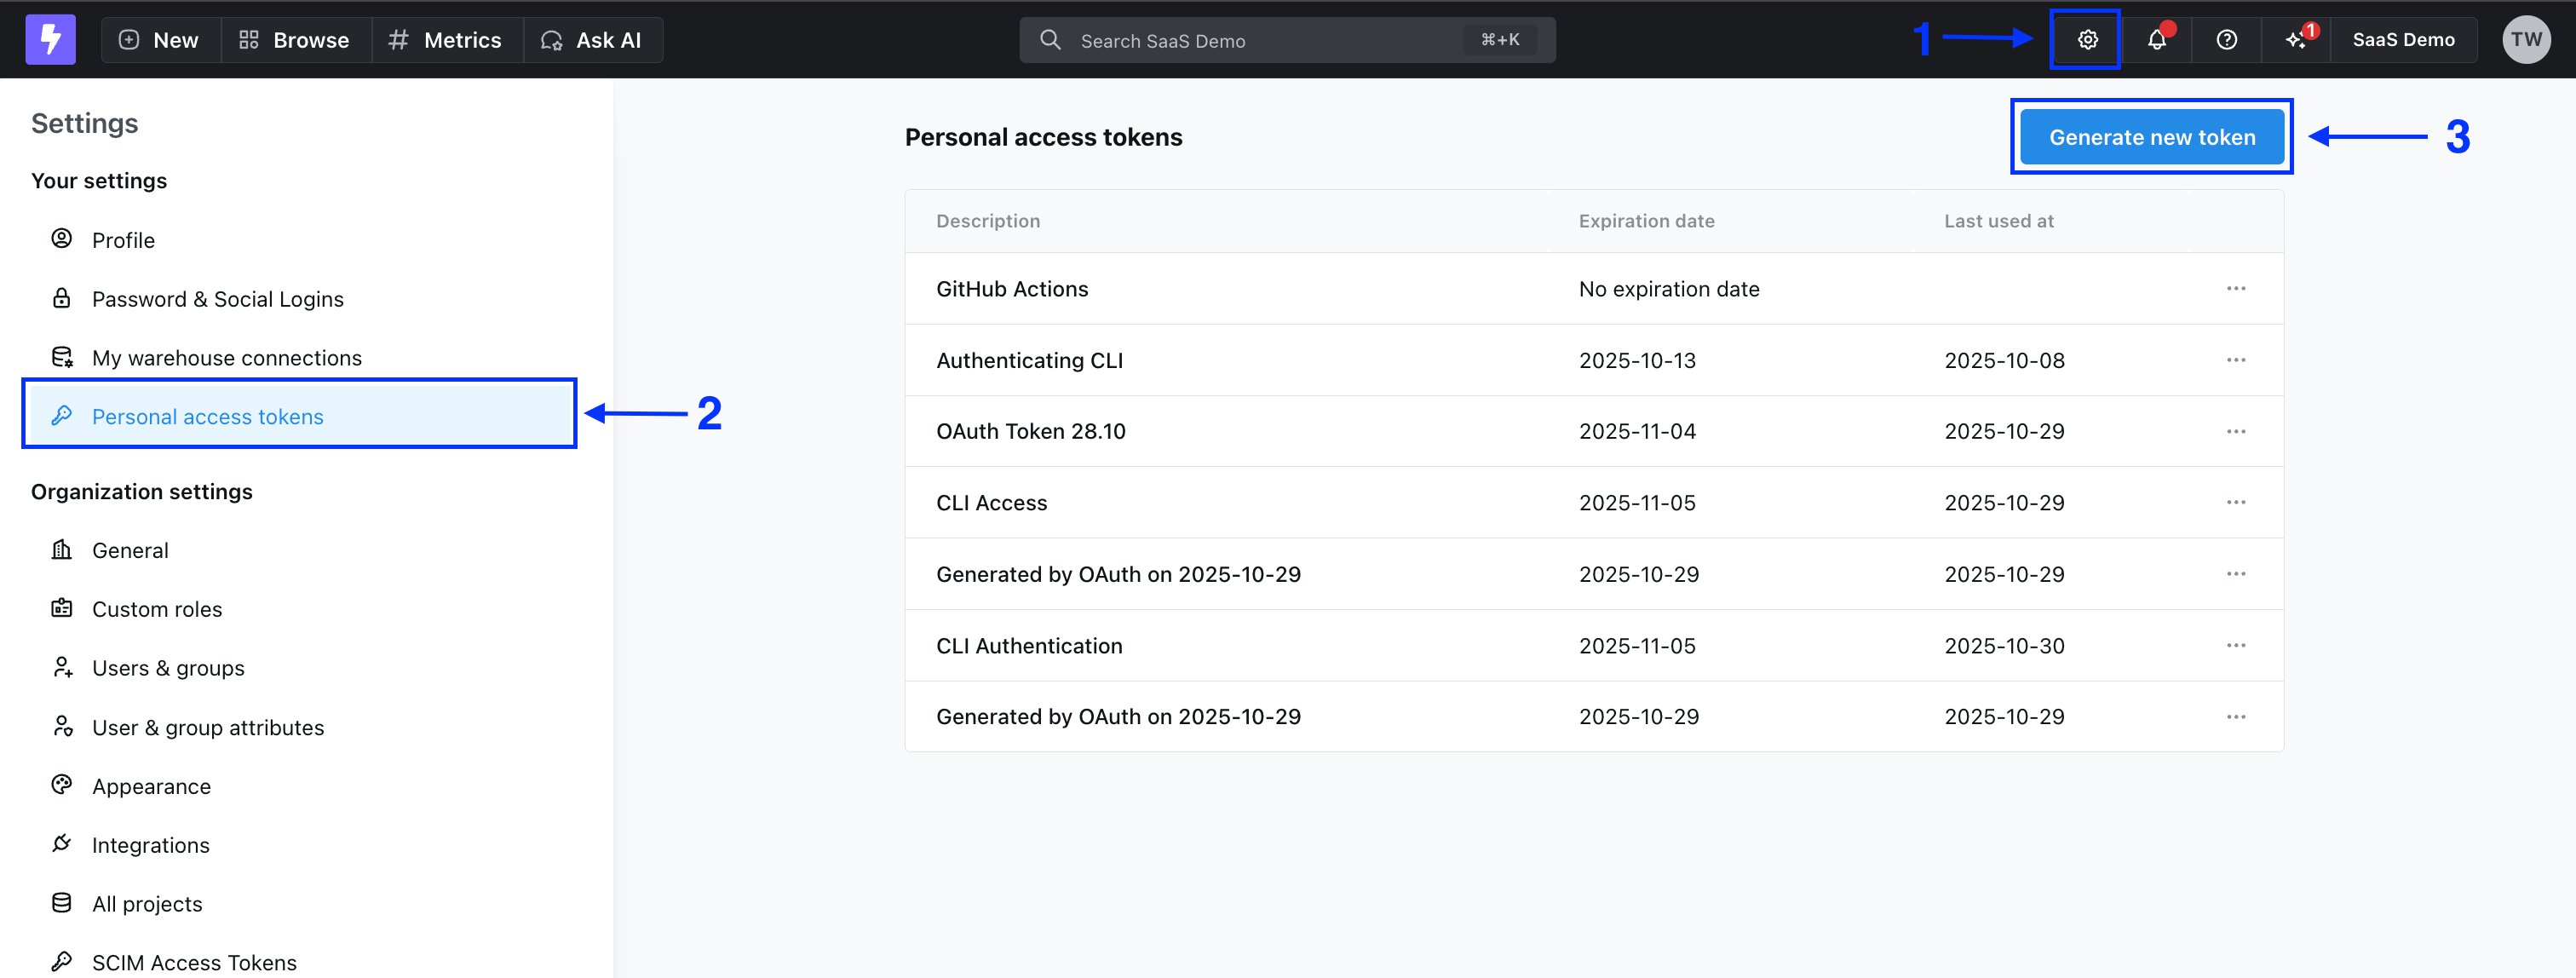
If you use single sign-on (SSO) in the browser, login with a personal access token.
First, create a new personal access token in the UI by going to Settings > Personal Access Tokens.
### Flexible URL formats
The CLI accepts your instance URL in multiple formats, all of these work:
```bash theme={null}
# Just your subdomain (recommended for Lightdash Cloud)
lightdash login your_subdomain_here
# Full domain without protocol
lightdash login your_subdomain_here.lightdash.cloud
# Full URL with protocol
lightdash login https://your_subdomain_here.lightdash.cloud
# Any URL from your Lightdash instance (useful for copying from browser)
lightdash login https://your_subdomain_here.lightdash.cloud/projects/abc123/dashboards
```
For Lightdash Cloud users, you can simply use your subdomain (e.g., `petey` if your instance is at `petey.lightdash.cloud`).
For self-hosted instances, you can use the full domain without the `https://` prefix - it's assumed automatically.
### Re-authenticate to a previous instance
Once you've logged in, you can re-authenticate without specifying the URL:
```bash theme={null}
lightdash login
```
This uses your previously saved instance URL.
If you use single sign-on (SSO) in the browser, login with a personal access token.
First, create a new personal access token in the UI by going to Settings > Personal Access Tokens.
 Then, run the following command:
```bash theme={null}
lightdash login your_subdomain_here --token
```
You can use the following environment variables to authenticate yourself on each command:
* **LIGHTDASH\_API\_KEY** a personal access token you can generate in the app under the user settings
* **LIGHTDASH\_URL** address for your running Lightdash instance
* **LIGHTDASH\_PROXY\_AUTHORIZATION** if your Lightdash instance is behind a proxy like [Cloud IAP](https://cloud.google.com/iap) you can set here `Proxy-Authentication` header value
Example:
```bash theme={null}
LIGHTDASH_API_KEY=946fedb74003405646867dcacf1ad345 LIGHTDASH_URL="https://your_subdomain_here.lightdash.cloud" LIGHTDASH_PROXY_AUTHORIZATION="Bearer " lightdash preview
```
## Set active project
When you login you'll be asked to set an active project.
Your active project is just the one that you're working on/developing in. Your organization might just have one project, so that makes your decision easy!
You can change your active project by running:
```bash theme={null}
lightdash config set-project
```
Or you can use the `LIGHTDASH_PROJECT` environment variable to indicate what project UUID the command should use.
Example:
```bash theme={null}
LIGHTDASH_PROJECT="3675b69e-8324-4110-bdca-059031aa8da3" lightdash deploy
```
## Now that you've logged in, you're ready to use the CLI
You can see all of the actions available on the CLI by typing this in your terminal:
```bash theme={null}
lightdash
```
Some of our favourites are:
* [Automatically generating .yml for your dbt models using lightdash generate](/guides/cli/how-to-auto-generate-schema-files)
* [Testing your changes with developer previews using lightdash preview](/guides/cli/how-to-use-lightdash-preview)
* [Deploying your changes to production using lightdash deploy](/guides/cli/how-to-use-lightdash-deploy)
Then, run the following command:
```bash theme={null}
lightdash login your_subdomain_here --token
```
You can use the following environment variables to authenticate yourself on each command:
* **LIGHTDASH\_API\_KEY** a personal access token you can generate in the app under the user settings
* **LIGHTDASH\_URL** address for your running Lightdash instance
* **LIGHTDASH\_PROXY\_AUTHORIZATION** if your Lightdash instance is behind a proxy like [Cloud IAP](https://cloud.google.com/iap) you can set here `Proxy-Authentication` header value
Example:
```bash theme={null}
LIGHTDASH_API_KEY=946fedb74003405646867dcacf1ad345 LIGHTDASH_URL="https://your_subdomain_here.lightdash.cloud" LIGHTDASH_PROXY_AUTHORIZATION="Bearer " lightdash preview
```
## Set active project
When you login you'll be asked to set an active project.
Your active project is just the one that you're working on/developing in. Your organization might just have one project, so that makes your decision easy!
You can change your active project by running:
```bash theme={null}
lightdash config set-project
```
Or you can use the `LIGHTDASH_PROJECT` environment variable to indicate what project UUID the command should use.
Example:
```bash theme={null}
LIGHTDASH_PROJECT="3675b69e-8324-4110-bdca-059031aa8da3" lightdash deploy
```
## Now that you've logged in, you're ready to use the CLI
You can see all of the actions available on the CLI by typing this in your terminal:
```bash theme={null}
lightdash
```
Some of our favourites are:
* [Automatically generating .yml for your dbt models using lightdash generate](/guides/cli/how-to-auto-generate-schema-files)
* [Testing your changes with developer previews using lightdash preview](/guides/cli/how-to-use-lightdash-preview)
* [Deploying your changes to production using lightdash deploy](/guides/cli/how-to-use-lightdash-deploy)